
Thanatos Tower: Difference between revisions
class-wiki: new Thanatos Tower quest guide |
class-wiki: add screenshots and galleries |
||
| Line 1: | Line 1: | ||
[[File:Thanatos Tower banner.png|center|frameless|760px]] | |||
Thanatos Tower is the long-form PvE quest that unlocks the summoning of '''Memory of Thanatos''', the MVP that sleeps at the top of the tower. Reaching him means clearing five colour puzzles, converting the keys you win into Charm Stones, waking the statues on the 12th floor in the right order, and breaking the four Memory Seals that hold the boss in place. Expect a full run to take a while, and expect to need a group. | Thanatos Tower is the long-form PvE quest that unlocks the summoning of '''Memory of Thanatos''', the MVP that sleeps at the top of the tower. Reaching him means clearing five colour puzzles, converting the keys you win into Charm Stones, waking the statues on the 12th floor in the right order, and breaking the four Memory Seals that hold the boss in place. Expect a full run to take a while, and expect to need a group. | ||
| Line 20: | Line 22: | ||
== Getting there == | == Getting there == | ||
[[File:Thanatos Tower Gatei.png|thumb|right|260px|Tower Keeper Gatei, at the foot of the tower in Hugel field.]] | |||
[[File:Thanatos Tower Ditze.png|thumb|right|260px|Ditze on the 1st floor hands out the Rekenber work contract.]] | |||
* The tower stands in '''Hugel field''' (''hu_fild01 140, 163''). Talk to the '''Tower Keeper Gatei''' and pay the entrance fee. | * The tower stands in '''Hugel field''' (''hu_fild01 140, 163''). Talk to the '''Tower Keeper Gatei''' and pay the entrance fee. | ||
| Line 26: | Line 31: | ||
== Forming a group == | == Forming a group == | ||
[[File:Thanatos Tower Burled.png|thumb|right|200px|Burled opens the gate to the 3rd floor once five players are gathered.]] | |||
Go up to the 2nd floor and find '''Burled''', the Entrance Guide, on the east side of the map. He counts the players gathered around him and only opens the gate when there are at least five. The gate stays open for a few seconds, so everyone should be standing on top of it when he opens it. | Go up to the 2nd floor and find '''Burled''', the Entrance Guide, on the east side of the map. He counts the players gathered around him and only opens the gate when there are at least five. The gate stays open for a few seconds, so everyone should be standing on top of it when he opens it. | ||
| Line 34: | Line 41: | ||
=== Red Key, 3rd floor === | === Red Key, 3rd floor === | ||
[[File:Thanatos Tower 3F rune device.png|thumb|right|320px|The rune device in the south-west of the 3rd floor.]] | |||
The '''Rune Device''' sits in the south-west of the floor, wrapped in an energy field. Investigate it and smash the field with a level 4 weapon (or kick it as a Taekwon) to take the '''Red Key'''. A weaker weapon fails and you can simply come back with a better one. | The '''Rune Device''' sits in the south-west of the floor, wrapped in an energy field. Investigate it and smash the field with a level 4 weapon (or kick it as a Taekwon) to take the '''Red Key'''. A weaker weapon fails and you can simply come back with a better one. | ||
=== Yellow Key, 4th floor === | === Yellow Key, 4th floor === | ||
[[File:Thanatos Tower 4F rune device.png|thumb|right|320px|The keypad device in the north-east of the 4th floor.]] | |||
The '''Rune Device''' in the north-east asks for a three digit code. Digits run from 1 to 9, no zero, and no digit may repeat. After each guess the screen reports how many digits are correct and in the right position, and how many are correct but in the wrong position. It is the classic Mastermind guessing game. | The '''Rune Device''' in the north-east asks for a three digit code. Digits run from 1 to 9, no zero, and no digit may repeat. After each guess the screen reports how many digits are correct and in the right position, and how many are correct but in the wrong position. It is the classic Mastermind guessing game. | ||
| Line 49: | Line 60: | ||
=== Blue Key, 5th floor === | === Blue Key, 5th floor === | ||
[[File:Thanatos Tower 5F statue.png|thumb|right|320px|The winged statue on the 5th floor takes the Red and Yellow keys.]] | |||
The winged '''Brilliant Statue''' stands to the north. It has a crack in each wing, lit red on the left and gold on the right. Choose to insert a key, then '''type the key name''': ''Red Key'' for the left wing first, then ''Yellow Key'' for the right one. The statue opens and gives you the '''Blue Key'''. | The winged '''Brilliant Statue''' stands to the north. It has a crack in each wing, lit red on the left and gold on the right. Choose to insert a key, then '''type the key name''': ''Red Key'' for the left wing first, then ''Yellow Key'' for the right one. The statue opens and gives you the '''Blue Key'''. | ||
=== Green Key, 6th floor === | === Green Key, 6th floor === | ||
[[File:Thanatos Tower 6F statue.png|thumb|right|320px|The wheel statue in the north-east corner of the 6th floor.]] | |||
The '''Brilliant Statue''' in the north-east corner needs the Red, Yellow and Blue keys before it opens. Inside are five wheels, two small and three large, and the machine only starts once every wheel sits at the same height. Investigate the wheels and set them like this: | The '''Brilliant Statue''' in the north-east corner needs the Red, Yellow and Blue keys before it opens. Inside are five wheels, two small and three large, and the machine only starts once every wheel sits at the same height. Investigate the wheels and set them like this: | ||
| Line 73: | Line 88: | ||
=== Black Key, 6th floor === | === Black Key, 6th floor === | ||
[[File:Thanatos Tower 6F splendid sword.png|thumb|right|320px|The Splendid Sword and its table on the 6th floor.]] | |||
The '''Splendid Sword''' hangs above a table in the north-east part of the floor, a short walk from the wheel statue, and only reacts once you carry all four coloured keys. Observe it, then grab the '''hilt''' of the sword and '''insert the sword into the hole''' that appears in the table. Grabbing the blade or striking the table instead costs 20% of your HP and returns the sword to its place. Done correctly, the table yields the '''Black Key'''. | The '''Splendid Sword''' hangs above a table in the north-east part of the floor, a short walk from the wheel statue, and only reacts once you carry all four coloured keys. Observe it, then grab the '''hilt''' of the sword and '''insert the sword into the hole''' that appears in the table. Grabbing the blade or striking the table instead costs 20% of your HP and returns the sword to its place. Done correctly, the table yields the '''Black Key'''. | ||
| Line 79: | Line 96: | ||
== Charm Stones == | == Charm Stones == | ||
[[File:Thanatos Tower 6F portal.png|thumb|right|300px|The portal at the centre of the 6th floor turns the Black Key into the Black Charm Stone.]] | |||
[[File:Thanatos Tower 8F shining crystal.png|thumb|right|300px|Shining Crystals line the alcoves of the 8th floor.]] | |||
Keys are useless to the statues on the 12th floor. Each one has to be turned into a Charm Stone first. | Keys are useless to the statues on the 12th floor. Each one has to be turned into a Charm Stone first. | ||
| Line 121: | Line 141: | ||
| 5 || Dark Devil Statue || north || Black | | 5 || Dark Devil Statue || north || Black | ||
|} | |} | ||
<gallery mode="packed" heights="200"> | |||
Thanatos Tower 12F gold statue.png|1. Gold Religious Statue, Yellow Charm Stone | |||
Thanatos Tower 12F green statue.png|2. Green Wiseman Statue, Green Charm Stone | |||
Thanatos Tower 12F blue statue.png|3. Blue Angel Statue, Blue Charm Stone | |||
Thanatos Tower 12F red statue.png|4. Bloody Knight Statue, Red Charm Stone | |||
Thanatos Tower 12F black statue.png|5. Dark Devil Statue, Black Charm Stone | |||
</gallery> | |||
Each successful insertion is announced on the map, so the whole floor can follow the progress. The sequence is shared, which means different players can each contribute a stone. Once the Dark Devil Statue is fed, a portal opens in the centre of the floor and stays open until the boss has been summoned. Stand on it for a few seconds and it pulls you into the boss map, so gather the group before the last stone goes in. | Each successful insertion is announced on the map, so the whole floor can follow the progress. The sequence is shared, which means different players can each contribute a stone. Once the Dark Devil Statue is fed, a portal opens in the centre of the floor and stays open until the boss has been summoned. Stand on it for a few seconds and it pulls you into the boss map, so gather the group before the last stone goes in. | ||
[[File:Thanatos Tower 12F portal.png|center|thumb|420px|The portal that opens in the centre of the 12th floor once all five statues are awake.]] | |||
== The boss room == | == The boss room == | ||
| Line 139: | Line 169: | ||
| North-west || Fragment of Despair || Despero of Thanatos | | North-west || Fragment of Despair || Despero of Thanatos | ||
|} | |} | ||
<gallery mode="packed" heights="190"> | |||
Thanatos Tower seal misery.png|North-east crest, Fragment of Misery | |||
Thanatos Tower seal agony.png|South-east crest, Fragment of Agony | |||
Thanatos Tower seal hatred.png|South-west crest, Fragment of Hatred | |||
Thanatos Tower seal despair.png|North-west crest, Fragment of Despair | |||
</gallery> | |||
You may take the crests in any order, and nothing stops you from waking several guardians at once, although handling them one at a time is far safer. When the fourth guardian dies, everyone on the map is pulled to the great seal in the north. | You may take the crests in any order, and nothing stops you from waking several guardians at once, although handling them one at a time is far safer. When the fourth guardian dies, everyone on the map is pulled to the great seal in the north. | ||
[[File:Thanatos Tower boss summon.png|thumb|right|300px|Thanatos speaks before the MVP takes shape.]] | |||
Touching that seal starts the summoning. Thanatos speaks for about fifteen seconds, then '''Memory of Thanatos''' appears: a level 99 Large Demon of the Ghost 4 element, and a proper MVP. Bring status cures, ranged damage and healing. | Touching that seal starts the summoning. Thanatos speaks for about fifteen seconds, then '''Memory of Thanatos''' appears: a level 99 Large Demon of the Ghost 4 element, and a proper MVP. Bring status cures, ranged damage and healing. | ||
After he dies the map announces a countdown and clears everyone back to the 12th floor about half a minute later, so pick up the loot immediately. Notable drops include the '''Thanatos Card''', '''Treasure Box''', '''Enriched Elunium''', '''Yggdrasilberry''', '''Morrigane's Manteau''', '''Heavenly Dark Flame''' and '''Bloody Iron Ball'''. | After he dies the map announces a countdown and clears everyone back to the 12th floor about half a minute later, so pick up the loot immediately. Notable drops include the '''Thanatos Card''', '''Treasure Box''', '''Enriched Elunium''', '''Yggdrasilberry''', '''Morrigane's Manteau''', '''Heavenly Dark Flame''' and '''Bloody Iron Ball'''. | ||
[[File:Thanatos Tower tomb.png|thumb|right|300px|The Thanatos Tomb on the 12th floor marks the cooldown.]] | |||
The seals then stay closed for '''2 hours'''. During that window the '''Thanatos Tomb''' stands on the 12th floor and shows the time of death together with the top three damage dealers of the kill. When the tomb disappears, the crests are ready again. | The seals then stay closed for '''2 hours'''. During that window the '''Thanatos Tomb''' stands on the 12th floor and shows the time of death together with the top three damage dealers of the kill. When the tomb disappears, the crests are ready again. | ||
Latest revision as of 16:15, 27 July 2026

Thanatos Tower is the long-form PvE quest that unlocks the summoning of Memory of Thanatos, the MVP that sleeps at the top of the tower. Reaching him means clearing five colour puzzles, converting the keys you win into Charm Stones, waking the statues on the 12th floor in the right order, and breaking the four Memory Seals that hold the boss in place. Expect a full run to take a while, and expect to need a group.
Requirements
| Requirement | Detail |
|---|---|
| Group | At least 5 players standing next to the guide on the 2nd floor to open the gate to the 3rd floor. They do not have to be in your party, only nearby. |
| Weapon | A level 4 weapon equipped in your right hand for the 3rd floor device. Taekwon characters break that device with a kick and need no weapon. |
| Class | The portal from the 6th to the 7th floor only accepts Transcendent classes, second-class-and-above characters, and Expanded classes (Super Novice, Taekwon, Star Gladiator, Soul Linker, Ninja, Gunslinger, Summoner) at base level 95 or higher. |
| Entrance fee | 5,000 zeny, reduced to 3,000 zeny once you have signed the Rekenber work contract. |
| Boss room | One Fragment of Misery, one Fragment of Agony, one Fragment of Hatred and one Fragment of Despair. |
Getting there


- The tower stands in Hugel field (hu_fild01 140, 163). Talk to the Tower Keeper Gatei and pay the entrance fee.
- On the 1st floor, speak to Ditze, the Thanatos Tower Guide, and ask about the temporary job. Read and sign the contract. This is mandatory: the guides on the upper floors only let contracted workers through.
- Liei stands right beside her and runs the reward counter, where tower materials can be exchanged for costumes and headgear.
Forming a group

Go up to the 2nd floor and find Burled, the Entrance Guide, on the east side of the map. He counts the players gathered around him and only opens the gate when there are at least five. The gate stays open for a few seconds, so everyone should be standing on top of it when he opens it.
The five keys
Each key lives on its own floor, and later keys need the earlier ones in your bag.
Red Key, 3rd floor

The Rune Device sits in the south-west of the floor, wrapped in an energy field. Investigate it and smash the field with a level 4 weapon (or kick it as a Taekwon) to take the Red Key. A weaker weapon fails and you can simply come back with a better one.
Yellow Key, 4th floor

The Rune Device in the north-east asks for a three digit code. Digits run from 1 to 9, no zero, and no digit may repeat. After each guess the screen reports how many digits are correct and in the right position, and how many are correct but in the wrong position. It is the classic Mastermind guessing game.
- You may guess as often as you like.
- Changing a single digit between guesses tells you the most.
- If you fail five guesses in a row the screen shows you the answer, but the code is then replaced by a new one before you can use it.
- Solver: choobs.org number helper.
Cracking the code produces the Yellow Key.
Blue Key, 5th floor

The winged Brilliant Statue stands to the north. It has a crack in each wing, lit red on the left and gold on the right. Choose to insert a key, then type the key name: Red Key for the left wing first, then Yellow Key for the right one. The statue opens and gives you the Blue Key.
Green Key, 6th floor

The Brilliant Statue in the north-east corner needs the Red, Yellow and Blue keys before it opens. Inside are five wheels, two small and three large, and the machine only starts once every wheel sits at the same height. Investigate the wheels and set them like this:
| Wheel | Setting |
|---|---|
| 1st Small Wheel | Raise Wheel |
| 2nd Small Wheel | Lower Wheel |
| 1st Big Wheel | Vertically Shift Wheel |
| 2nd Big Wheel | Raise Wheel |
| 3rd Big Wheel | Raise Wheel |
The menu also lets you review the current configuration and reset every wheel, so a wrong move costs nothing. When the last wheel lines up the statue releases the Green Key.
Black Key, 6th floor

The Splendid Sword hangs above a table in the north-east part of the floor, a short walk from the wheel statue, and only reacts once you carry all four coloured keys. Observe it, then grab the hilt of the sword and insert the sword into the hole that appears in the table. Grabbing the blade or striking the table instead costs 20% of your HP and returns the sword to its place. Done correctly, the table yields the Black Key.
While you are there you can also take Varmunt's Journal from the table. It is not needed for the boss, but it is the item that finishes the story quest (see Story reward).
Charm Stones


Keys are useless to the statues on the 12th floor. Each one has to be turned into a Charm Stone first.
- The portal in the centre of the 6th floor converts the Black Key into the Black Charm Stone as you pass through it, and drops you in the stairwell that leads to the 7th floor. This is the portal that enforces the class and level requirement.
- On the 8th floor, four Shining Crystals are scattered across the map. Each one accepts a single colour and returns the matching Charm Stone, so you need to find all four to convert the Red, Yellow, Blue and Green keys.
- The crystals move. Every 10 minutes they vanish and reappear at a different set of positions, and the cycle repeats every 40 minutes. If a colour is nowhere to be found, wait for the next rotation.
Memory Fragments
The four fragments the boss room asks for do not come from a puzzle. They drop from the wandering Thanatos mini-bosses that patrol the upper floors, and each one always carries its own fragment.
| Fragment | Dropped by | Found on |
|---|---|---|
| Fragment of Agony | Dolor of Thanatos | 5th and 9th floors |
| Fragment of Misery | Maero of Thanatos | 6th and 10th floors |
| Fragment of Despair | Despero of Thanatos | 7th and 11th floors |
| Fragment of Hatred | Odium of Thanatos | 8th floor |
All four are Undead, Ghost element mini-bosses, so holy and fire damage work well against them. They respawn roughly every 30 to 50 minutes, which is the main reason a full run takes so long: collect the fragments while you climb rather than backtracking for them, because the floors above the 4th are one-way.
The statues on the 12th floor
Five statues ring the 12th floor and each one takes a single Charm Stone. The order is fixed and a statue will not react until the previous one has been fed.
| Order | Statue | Location | Charm Stone |
|---|---|---|---|
| 1 | Gold Religious Statue | east | Yellow |
| 2 | Green Wiseman Statue | south-east | Green |
| 3 | Blue Angel Statue | south-west | Blue |
| 4 | Bloody Knight Statue | west | Red |
| 5 | Dark Devil Statue | north | Black |
-
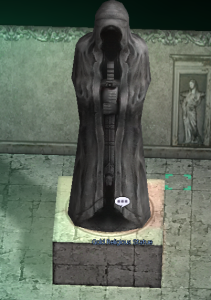 1. Gold Religious Statue, Yellow Charm Stone
 -
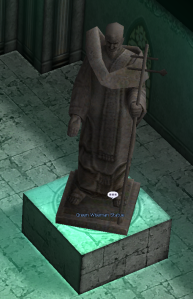 2. Green Wiseman Statue, Green Charm Stone
 -
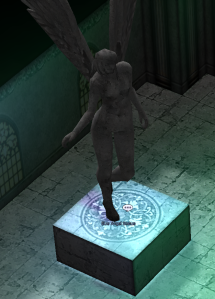 3. Blue Angel Statue, Blue Charm Stone
 -
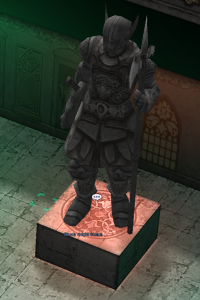 4. Bloody Knight Statue, Red Charm Stone
 -
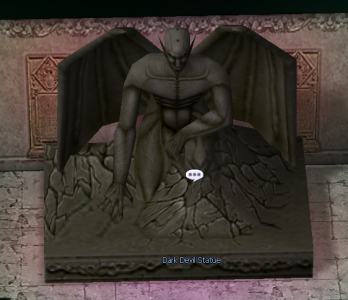 5. Dark Devil Statue, Black Charm Stone


Each successful insertion is announced on the map, so the whole floor can follow the progress. The sequence is shared, which means different players can each contribute a stone. Once the Dark Devil Statue is fed, a portal opens in the centre of the floor and stays open until the boss has been summoned. Stand on it for a few seconds and it pulls you into the boss map, so gather the group before the last stone goes in.

The boss room
Four Memory Seal crests sit in the corners of the boss map, each one missing a fragment. Walk up to a crest and type the exact name of the fragment it wants, for example Fragment of Misery. The fragment is consumed, the crest goes dark and its guardian appears on the spot.
| Crest | Type | Guardian |
|---|---|---|
| North-east | Fragment of Misery | Maero of Thanatos |
| South-east | Fragment of Agony | Dolor of Thanatos |
| South-west | Fragment of Hatred | Odium of Thanatos |
| North-west | Fragment of Despair | Despero of Thanatos |
-
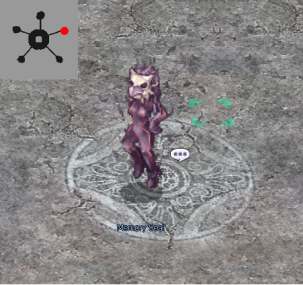 North-east crest, Fragment of Misery
 -
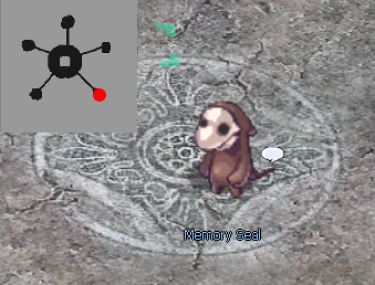 South-east crest, Fragment of Agony
 -
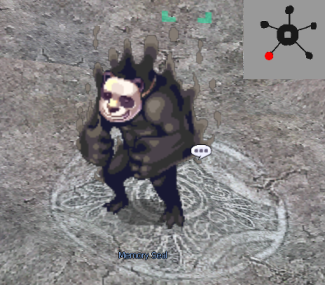 South-west crest, Fragment of Hatred
 -
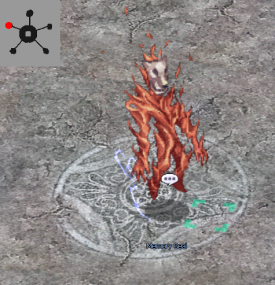 North-west crest, Fragment of Despair


You may take the crests in any order, and nothing stops you from waking several guardians at once, although handling them one at a time is far safer. When the fourth guardian dies, everyone on the map is pulled to the great seal in the north.

Touching that seal starts the summoning. Thanatos speaks for about fifteen seconds, then Memory of Thanatos appears: a level 99 Large Demon of the Ghost 4 element, and a proper MVP. Bring status cures, ranged damage and healing.
After he dies the map announces a countdown and clears everyone back to the 12th floor about half a minute later, so pick up the loot immediately. Notable drops include the Thanatos Card, Treasure Box, Enriched Elunium, Yggdrasilberry, Morrigane's Manteau, Heavenly Dark Flame and Bloody Iron Ball.

The seals then stay closed for 2 hours. During that window the Thanatos Tomb stands on the 12th floor and shows the time of death together with the top three damage dealers of the kill. When the tomb disappears, the crests are ready again.
Story reward
Summoning the boss and finishing the quest are two different things. The quest line advances only if you follow the vision that appears each time you claim a key and choose to concentrate on it, in floor order. Take Varmunt's Journal from the sword table on the 6th floor, then return to Burled on the 2nd floor and show it to him. He hands over an Old Violet Box and a block of experience for keeping the tower's secrets away from Rekenber.
Tips and notes
- Destroy any leftover Charm Stone before you touch a key device, and never leave a Charm Stone in storage.
- From the 5th floor upward there are no stairs back down. Plan the run in one direction and finish what you need on a floor before you leave it.
- Warp Portal memo points cannot be saved anywhere in the tower.
- Teleport and Fly Wing are blocked on the 7th floor and above, including the stairwells. They still work on floors 3 to 6.
- Logging out on a tower floor leaves your character where it was, but logging out in the boss room sends you back to your save point.
- Carry consumables and free weight. Each key, stone and fragment takes inventory space, and a full bag can block a reward outright.
- Spare Memory Fragments are not wasted. The reward counter on the 1st floor accepts them in bulk as part of its exchanges.